A calm first month comes from a few steady habits. Learn the names of the parts, follow clear steps, and keep short notes after each session. The dictionary below explains the core setup ideas that help every beginner on an any club line: brace height, bow stringers, safe stringing, nocking points, basic string knowledge, arrow-side essentials, a small toolkit, quick fixes, and everyday range rhythm. Read straight through once, then keep it handy in your notebook or on your phone during practice. Confidence grows fast when the same simple actions repeat the same way each time.
1. Brace height
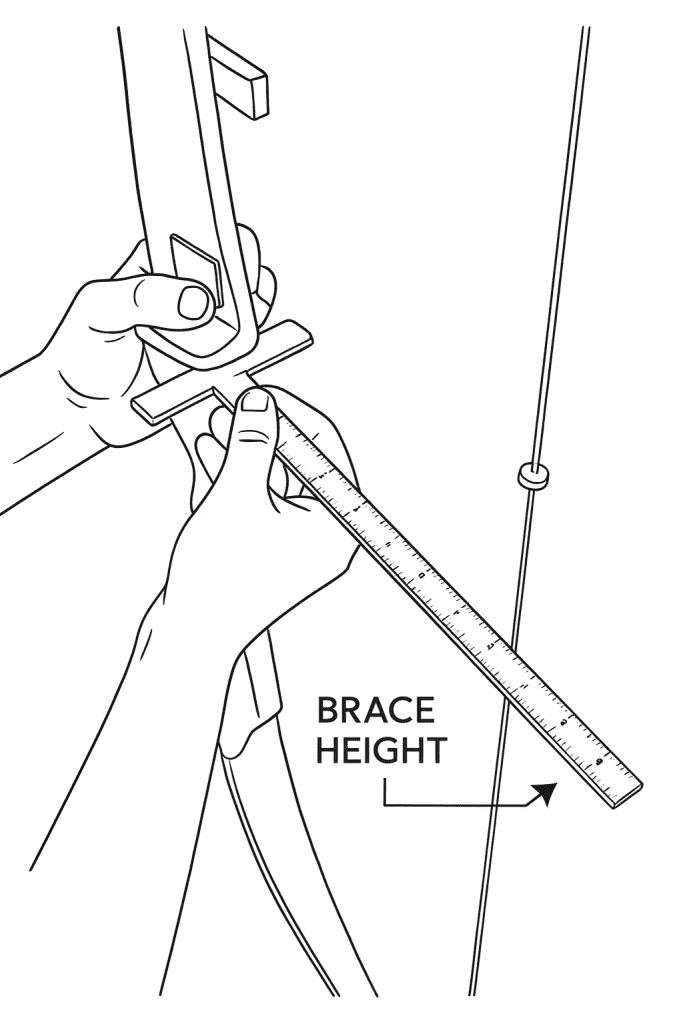
Definition. Brace height is the distance from the deepest part of the grip—the pivot point—to the string when the bow sits strung. A small ruler or a purpose-made brace gauge measures it in inches or millimetres.
Why it matters. A steady brace height supports smooth arrow clearance, cleaner sound, and a settled feel in the bow hand. It also supports consistency from end to end. Many modern recurves live comfortably somewhere around 7½–9 inches. Many longbows settle somewhere around 6–7½ inches. Makers publish a recommended window for each model. Aim for the maker’s window first, then fine-tune by feel over a few sessions.
How to check. Place the gauge at the pivot point, read the number where it meets the string, and write today’s value in a notebook. A single number on paper helps you repeat success later.
How to adjust. Add twists to the string to raise brace height. Remove twists to lower it. A small change (one or two twists) goes a long way. After any change, shoot three ends, listen to the sound, feel the bow in the hand, and glance at grouping. Record the new number and one short line about feel.
2. Bow stringer
What it is. A bow stringer is a strap-and-cup tool that helps you string and unstring safely. One cup sits over a limb tip, the saddle or second cup sits on the other limb, and the strap runs between.
Why it matters. A stringer protects limb alignment, protects shoulders and backs, and gives beginners a reliable method from day one. It also builds the habit of checking each tip during setup, which prevents mis-seated loops and the problems that follow.
Types. Common versions include saddle-and-pocket and dual-cup designs. Recurve and longbow versions look slightly different; a shop can match the right model to your bow.
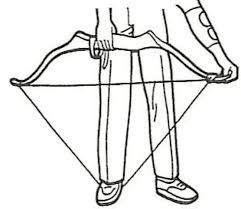
Safe use. Place the lower loop first. Fit the stringer cups on the tips as directed. Stand balanced with feet planted, raise the bow through the legs with a long spine, tension the limbs through the strap, slide the upper loop into its groove, and release tension slowly. Before a first arrow, look at both tips and confirm the loop sits in the groove.
How to string and unstring (with a stringer)
Stringing. Lay the bow on a table or rest it upright beside you. Slide the lower loop into the lower groove. Fit the stringer cups to the tips. Slip the upper loop onto the upper limb but leave it low on the taper. Step on the stringer, draw the bow upward with the strap, and guide the upper loop into the groove. Ease pressure until the limbs settle. Check both tips, then check again.
Unstringing. Fit the stringer cups, step on the strap, raise tension, slide the upper loop down the taper to a relaxed position, and release tension under control. Remove the stringer and store the bow. Wooden bows appreciate a rest between sessions; many modern recurves also enjoy relief when travel or storage lasts longer than a day.
Quick habit. Begin every shooting day with a tip check and a brace-height check. Two glances and one number keep equipment honest.
3. Nocking point

What it is. A nocking point is a small reference on the string that shows where the arrow clips on. With a nocking point, the arrow sits in the same place every time, which stabilises launch angle and helps grouping.
Why it matters. Without a reference, the nock creeps up or down and the arrow leaves at a different angle from shot to shot. A fixed reference brings repeatability to the launch and supports smooth clearance across the rest or shelf.
Simple starting position. Use a bow square. Clip it to the string and rest the ruler on the shelf or rest. Mark a start position slightly above square. A common starting lane for many recurves and barebows runs around ¼” to ½” above square. The exact sweet spot depends on bow, arrow, and shooter, so treat that lane as a safe launch point for first sessions.
How to tie a soft nocking point. Cut two short lengths of serving thread. Tie the top marker above the arrow nock position using alternating half hitches or a constrictor knot. Press the wraps snug with pliers or a thumbnail. Tie a second soft marker below the nock position to protect fingers and tabs and to stop the nock from riding down. Soft markers adjust easily in early weeks and feel kind on the release hand.
Brass nock option. A small brass nock crimps onto the string at the chosen height with nock pliers. A soft tie below the brass ring creates a kinder landing for the fingers.
First check. Shoot at close range. Watch for clean flight and an even feel off the rest or shelf. Keep deeper tuning methods—paper and bare-shaft—for a later guide once form settles.
4. String basics
Length and AMO. A string marked “AMO 68” suits a 68″ recurve even though the string itself arrives shorter than 68″. The AMO standard anticipates brace height and the geometry of the bow. Match the AMO number on the limb sticker or bow card.
Materials. Modern low-stretch fibres such as Dyneema blends serve many recurves and compounds. Dacron suits vintage bows and some traditional limbs that prefer gentler stretch. When in doubt, follow the limb maker’s guidance or ask a knowledgeable coach.
Serving. The centre serving creates a tough, smooth surface for the nock and sets nock fit. End servings protect the loops and the limb tips. A tidy serving protects fibres and extends string life.
Wax and care. Work a pea of string wax along the working strands, then warm it in with your fingers so it spreads evenly. Wipe off grit and dirt with a soft cloth. Inspect for fuzz, broken bundles, or gaps in serving. Retire any string that shows damage; fresh strings cost little compared with limb repair or a spoiled session.
Nock fit quick test. A good fit clicks on, stays for a light shake of the string, and releases with a small twist of the fingers. Too tight drags on the string; too loose falls away under a breath of movement. Adjust by changing nocks or centre-serving thickness.
5. Arrow-side essentials
Index fletch. The odd-colour feather or vane usually points away from the bow on many shelf-and-rest setups. That orientation clears the riser better and reduces contact.
Length. Early purchases benefit from a little extra arrow length beyond current draw while form matures. Extra room gives coaches more freedom to work on posture and anchor without equipment stress.
Spine in one breath. Shaft stiffness interacts with draw weight, arrow length, and point weight. A shop can match spine to your current setup in minutes. Later, a deeper article can unpack charts and tuning methods; a steady starter set carries you through month one and month two with ease.
6. A small toolkit that solves big problems
Build a simple kit and keep it in your bow bag. Aim for Brace Hight gage, a bow stringer, string wax, spare nocks, nock pliers or a small hemostat, short serving thread, a compact multi-tool, a roll of tape, a pencil or marker, and a soft cloth. A zip pouch keeps everything in one place. Reach-and-fix speed removes stress during a busy club night.
Quick fixes
String buzz or slap on the arm guard. Raise brace height with one or two twists. Shoot three ends and listen again. Record the new number.
Arrows wag or fishtail in the air. Reconfirm nocking-point height and nock fit, and check index-fletch orientation. Small corrections on the string often calm flight straight away.
Forearm kiss from the string. Check brace height, rotate the forearm so the soft inside faces away from the string path, and keep a soft elbow. An arm guard buys comfort while posture improves.
Upper loop creep. Before the first arrow each day, glance at both tips and confirm the loop sits in each groove. A one-second check prevents surprises at full draw.
Range rhythm in Irish clubs
Halls and outdoor ranges in Ireland often run mixed lines: recurve beside longbow, barebow beside compound. A few courtesies protect everyone’s focus. Whistle codes set the pace; step to the line when invited, shoot with calm attention, and return behind the waiting line when finished. During arrow collection, walk with steady awareness, eyes open for low or short shafts. Weather changes quickly, so plan layers, grippy footwear for wet grass or polished hall floors, and a small towel and spare socks for morale. A quick word with a coach or senior clubmate often solves a setup question in under a minute; invite that eye early and carry the habit forward.
Simple record-keeping
A small notebook turns experience into progress. Create a first page for equipment numbers: brace height today, nocking-point height relative to square, and any notes on nock fit. After each session, write a single line about feel: “Anchor landed clean,” “Bow hand stayed quiet,” or “Breath set the timing.” Short records make the next adjustment easy and keep stories honest over time.
Safe habits that pay off all year
Use a stringer for every stringing and unstringing action. Inspect the string before shooting, especially near loops and the centre serving. Measure brace height when you set up and when you pack down. Keep arrows in a safe tube or quiver for travel. Store wooden bows unstrung between sessions; give modern limbs relief where makers advise it. A short wipe-down and a touch of wax serve as a closing ritual that protects gear and mind together.
First-month checklist
- String the bow with a stringer and confirm loop seating at both tips.
- Measure brace height, record the number, and keep changes small.
- Set a simple nocking point slightly above square and protect fingers with a soft tie below.
- Check nock fit on the served centre: click on, light shake holds, small twist releases.
- Face the index fletch away from the riser on shelf/rest setups unless your coach directs otherwise.
- Pack a small toolkit so quick fixes feel easy.
- Invite a coach’s eye early; ten seconds together often unlocks a week of ease.
A steady setup builds a steady shot. The terms above create a shared language with coaches and clubmates and give you a safe method for day one and beyond. Measure, adjust in small steps, and write one line after each session. The bow answers that attention with clean sound, kinder feel in the hand, and groups that tighten across the month. Begin with the brace height number, a safe stringing habit, and a clear nocking point. Add care and simple records. Progress follows.
Views: 225