The inquiry is clear and simple: what is paper tuning, and how does a straightforward method on a home-built frame improve the flight of an arrow? A good question, for the true archer seeks efficiency, a clean, certain line between hand and target. This method, a kind of dialogue between the archer and the arrow, reveals the essential truth of form and equipment. The practice itself is a simple one, built on observation and correction, on making the invisible wobble of an arrow visible on a sheet of paper.
Paper tuning is a technique that shows how an arrow leaves a bowstring, revealing any errant motion or spin. When an archer shoots, a perfect release sends the arrow forward on a true path. But sometimes, the nock-end of the arrow moves up or down, left or right, a small, corrective motion that robs the arrow of energy and accuracy. Paper tuning makes this motion visible, a tear in the paper that tells a story.
This method rose to prominence in the mid-20th century, a time when archery saw a resurgence and a demand for greater precision. While its exact origin is tough to pinpoint, it’s a practice born of a necessity that every archer has known: the need to diagnose a flaw in flight. The core idea is simple, a sheet of paper fixed in a frame acts as a kind of tell-all witness. The arrow passes through, and the tear it makes leaves a distinct mark, a record of its final motion.
So, how do we get started? We begin with the frame itself.
Building and Setting Up Your Paper Tuning Frame
First, you’ll need to build a frame to hold your paper. The design is simple, and you can make one from materials found around any workshop.
Materials:
- Four lengths of 2×2 timber, cut to a square frame. A good size is about 3 feet by 3 feet.
- Four metal corner brackets and screws to hold the frame rigid.
- Two small clamps or spring clips to hold the paper at the top.
- A roll of painter’s paper or similar thin, uniform paper.
- A sturdy stand to hold the frame at chest height. You can use two sawhorses or even an old chair.
Assembly:
- Lay your four timber lengths on a flat surface, forming a square.
- Screw the metal brackets onto the corners to create a rigid frame. Make sure the joints are tight.
- Place your paper over the frame, pulling it taut. Use the clamps at the top to secure it firmly, and add a piece of tape at the bottom to hold it down. The paper should be drum-tight. Any slack will give you a false reading.
- Stand your frame up. Make sure it is plumb and level. The frame should be at the same height as your bow hand when you are at full draw.
- Set your target behind the paper frame. The distance between the paper and the target should be at least two feet to ensure the arrow can pass through without hitting the frame and so you can see the tear clearly.
How to Paper Tune: The Method
With your frame set up, it’s time to begin.
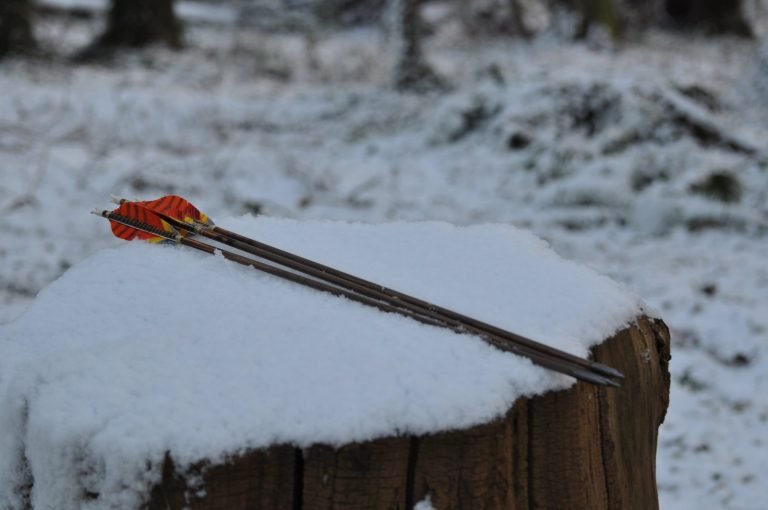
- Preparation: Stand 5 to 6 feet away from the paper frame. Make sure you are using an arrow with a field point, not a broadhead. Broadheads will always tear the paper differently and won’t give you a true reading.
- The First Shot: Nock your arrow and draw your bow. Aim for the center of the paper and shoot. You will hear the distinct rip as the arrow passes through the paper and lands in the target.
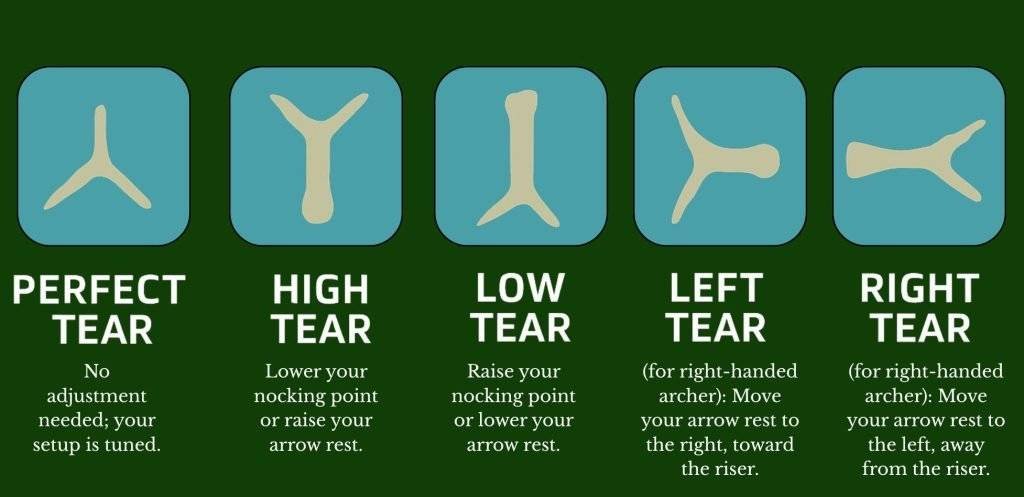
- Reading the Tear: Now, walk forward and look at the tear in the paper. The goal is a perfect “bullet hole” tear—a small, round hole with three fletching cuts radiating out from the center like a clean star. This indicates the arrow is flying straight and true from your bow.
If your tear is not a perfect bullet hole, it’s time to make a diagnosis.
- Tear Left/Right: If the left or right side of the paper is torn more than the other, your arrow is leaving the bow with a horizontal wobble.
- Right-handed shooter with a left tear: Your arrow is kicking left. You may need to move your arrow rest slightly to the right.
- Right-handed shooter with a right tear: Your arrow is kicking right. Move your arrow rest slightly to the left.
- Vice versa for a left-handed shooter.
- Tear Up/Down: If the top or bottom of the paper is torn more, your arrow is leaving the bow with a vertical wobble.
- Nock High Tear: The tear is high. Your nocking point on the string may be too low. You need to move your nocking point up on the string.
- Nock Low Tear: The tear is low. Your nocking point is likely too high. Move your nocking point down.
- Making Corrections: Make small, incremental adjustments to your arrow rest or nocking point. After each adjustment, step back and shoot another arrow through a fresh piece of paper. You’ll keep working this way, shot after shot, correction after correction, until your tear begins to look like that clean, perfect bullet hole.
This method, grounded in observation and action, allows a direct and honest assessment of your equipment. It is a quiet study, a solitary act of bringing your tools into harmony. The practice becomes a conversation with the self—a discipline of seeing the flaw, naming it, and making the change. The work is in the hands, in the small movement of a wrench on an arrow rest, in the quiet adjustment of a nocking point on the bowstring. The result is the sure and steady flight of the arrow, a small, tangible victory.
Views: 109
This article is part of our free content space, where everyone can find something worth reading. If it resonates with you and you’d like to support us, please consider purchasing an online membership.