For some, arrows are simply a tool, perhaps even overlooked. Something for throwing at the target and nothing more. Why would anyone labour over an arrow’s aesthetics?

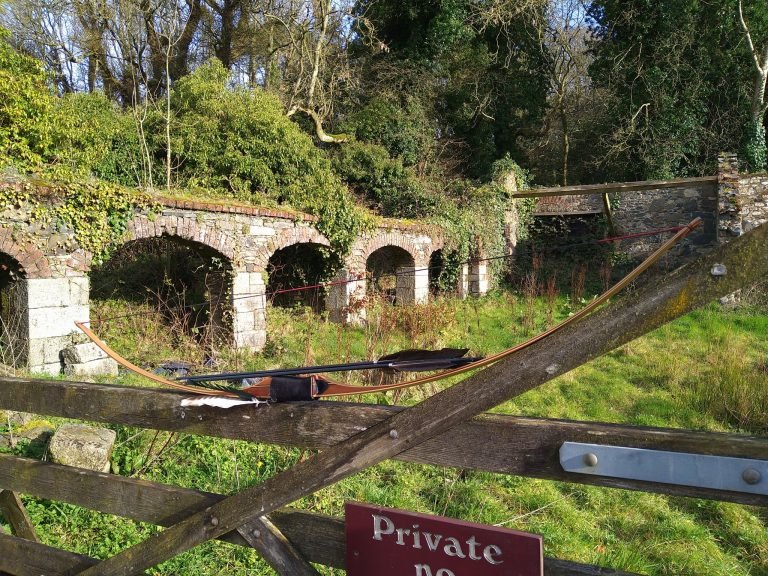
Well, when I began as a traditional archer, a seasoned trad shooter and good friend, Alan Craig said to me that trad was more about the arrows than the bow. At this time there seemed to be very few trad archers in the North, and this was long enough ago that trad archers were still using wooden arrows.
I have, for nearly a decade, been making wooden arrows, experimenting with aesthetic designs, trying knew fletch shapes to see what they can do, different types of wood, arrow lengths and spines, pile weights, and even testing what different numbers of flights on an arrow will do.
Now, I’m not writing an article to promote wooden arrows or sing of their praises in an attempt to convert any instinctive shooters reading this. I am merely attempting to promote the notion of making your own arrows or putting into them as much of your own efforts as you can, and to see them as more than a simple tool.
We decorate our quivers with badges and achievements and such – and if it was up to me, it would be mandatory – and wear club shirts. But what about extending this flare to our arrows, that bushel of tamed hunting birds, ready to be unleased?
Peacocks have their extravagant plumage, and so should the archer.
I won’t hear it, that arrows are not worth the time, because they get lost or broken – especially true for wooden arrows. After all, birds wear the most elegant of feathers, despite shedding and losing them so easily.
So, here I shall run you through a simple, quick – in arrow making terms – way to create spliced flights for your arrows.
First you need to decide the patterns and colours you want. At this point I would encourage you to be as imaginative as possible. Though given I never matured beyond thirteen years of age, that is easy for me to say and do.
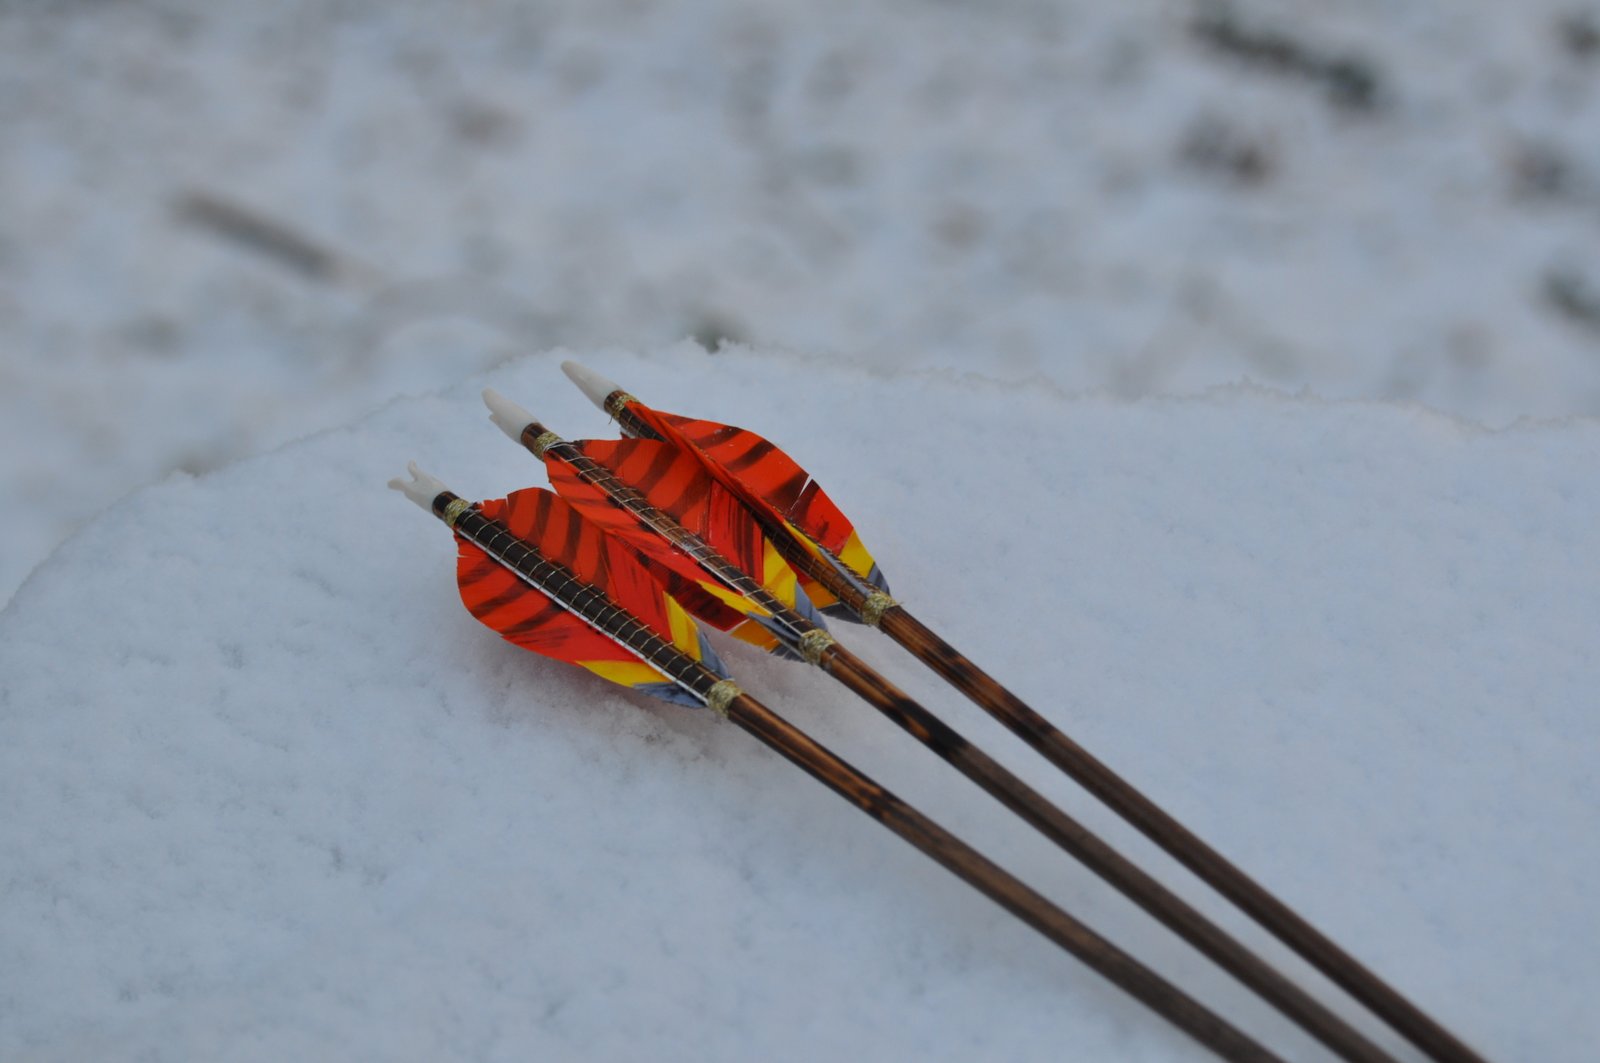
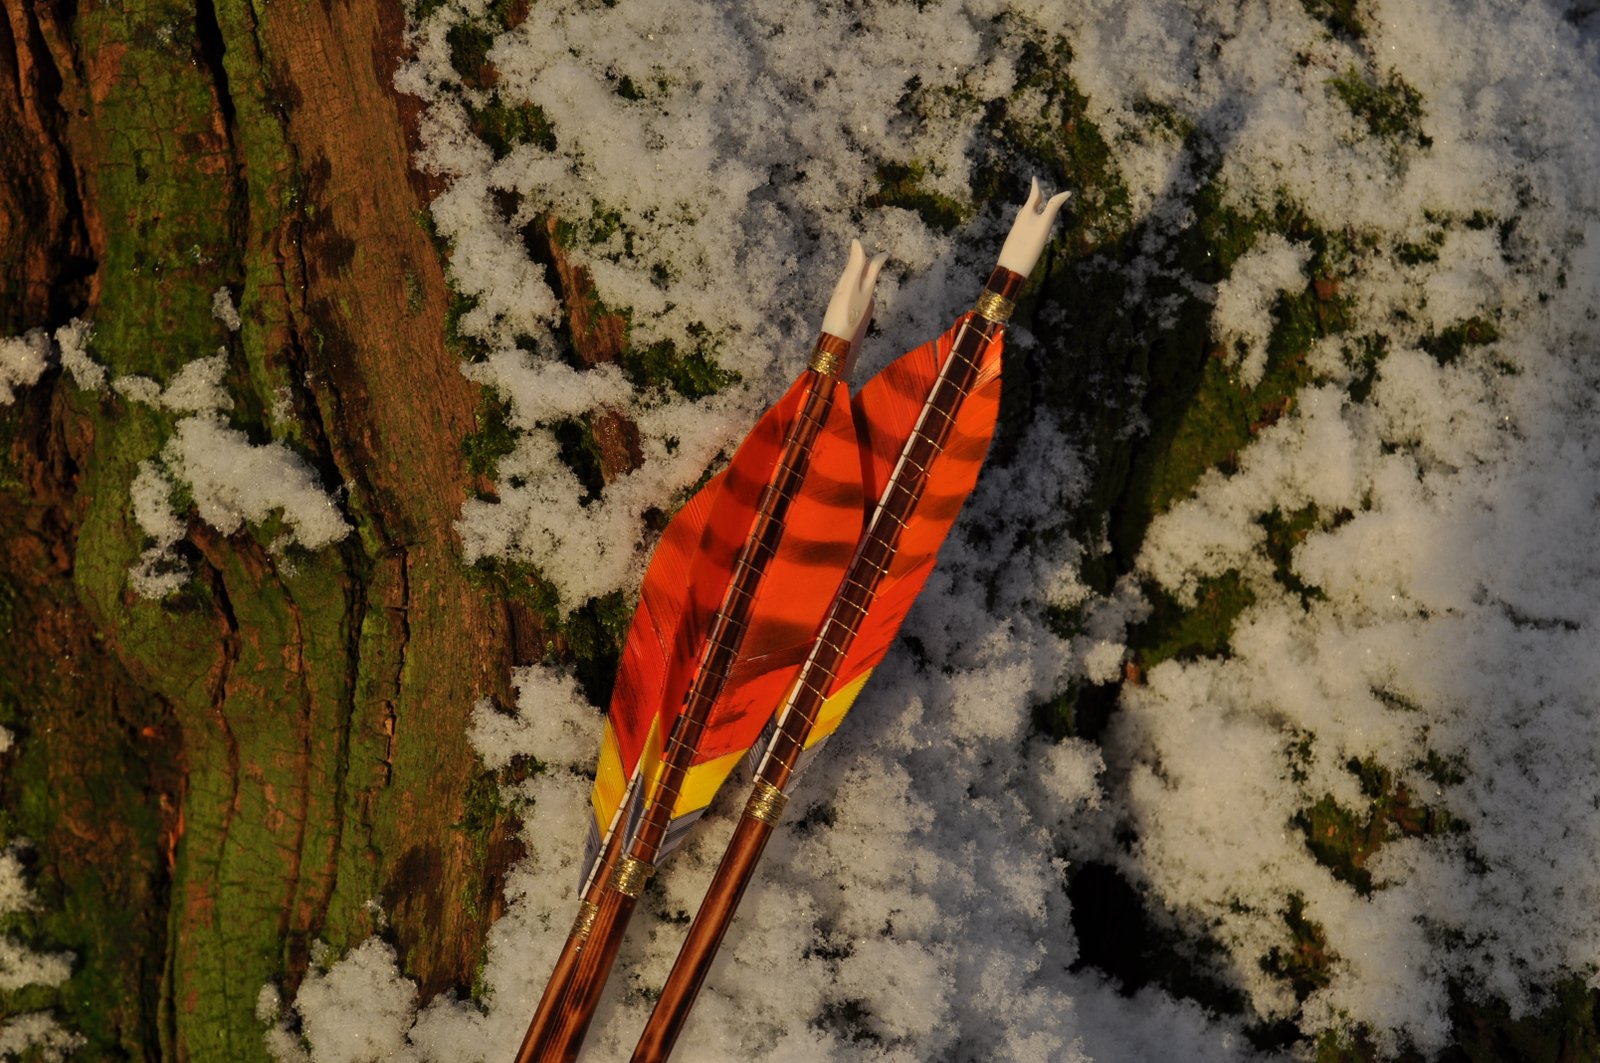
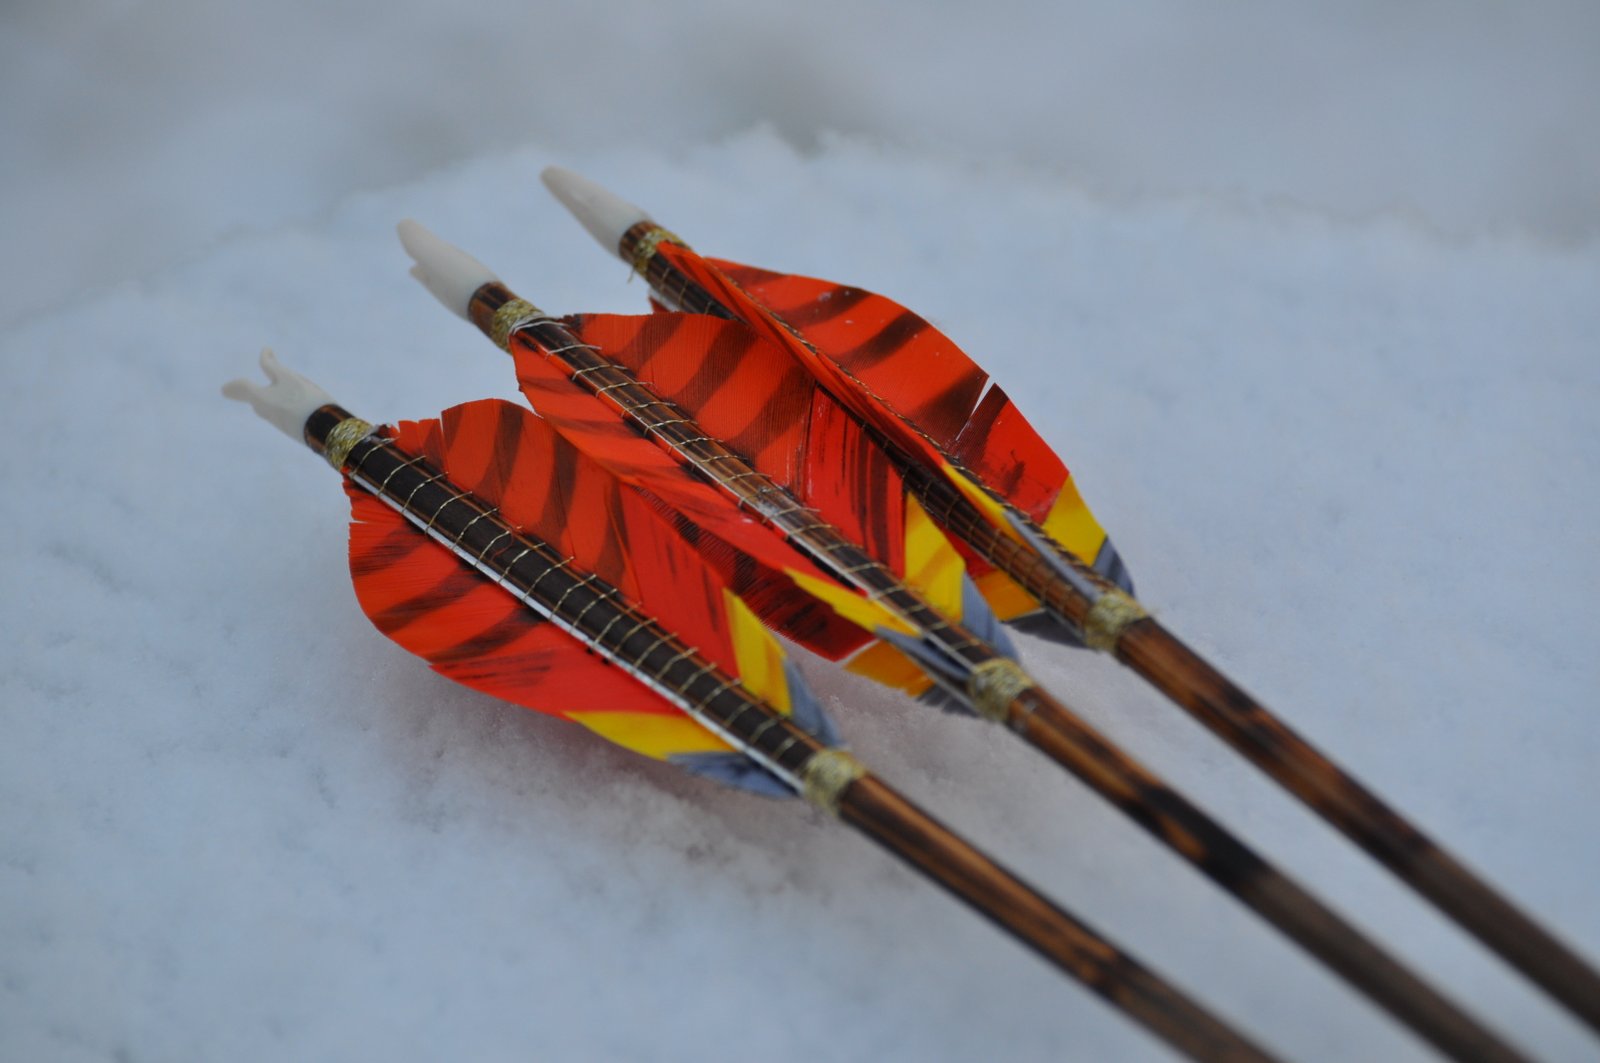
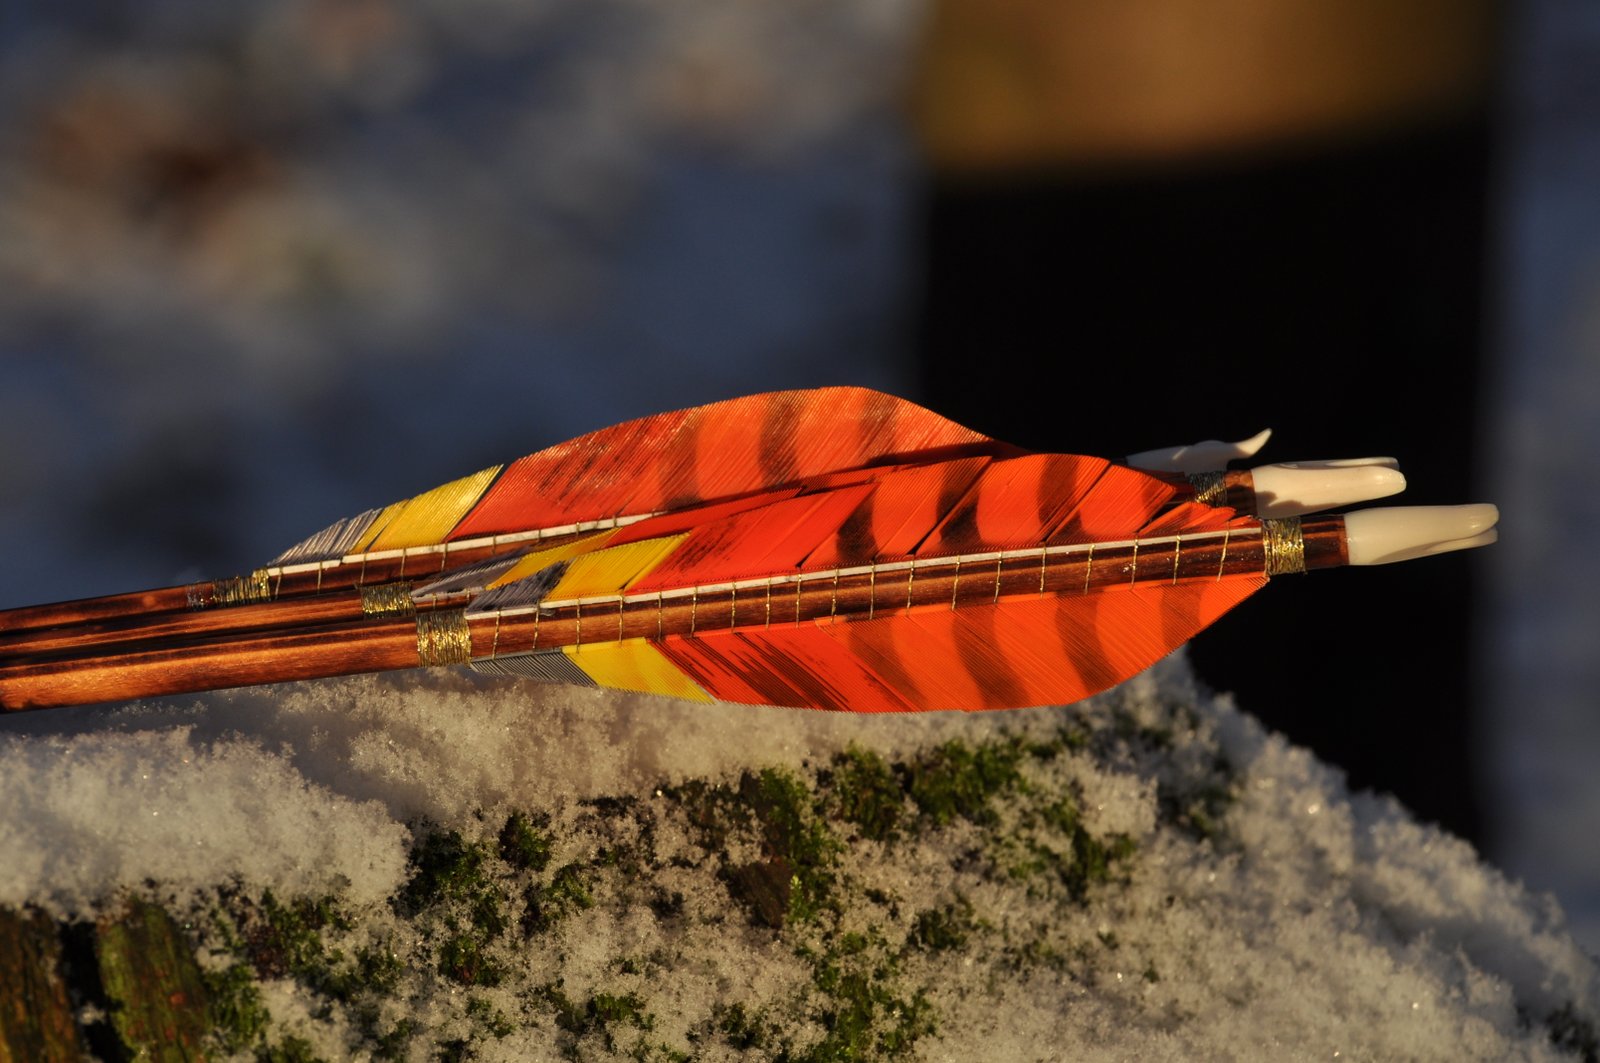
In this example, I shall me making phoenix fletched arrows! Yes, arrows fitted with fletches cut from a phoenix’s feathers.
Choosing the aesthetics was simple, as I wanted something that merged the colours and patterns of a flame with the colours and patterns of a bird of prey’s wing feather. It was just a matter of looking through various retailers’ stock of full-length feathers to find colours and patterns to match what I wanted.
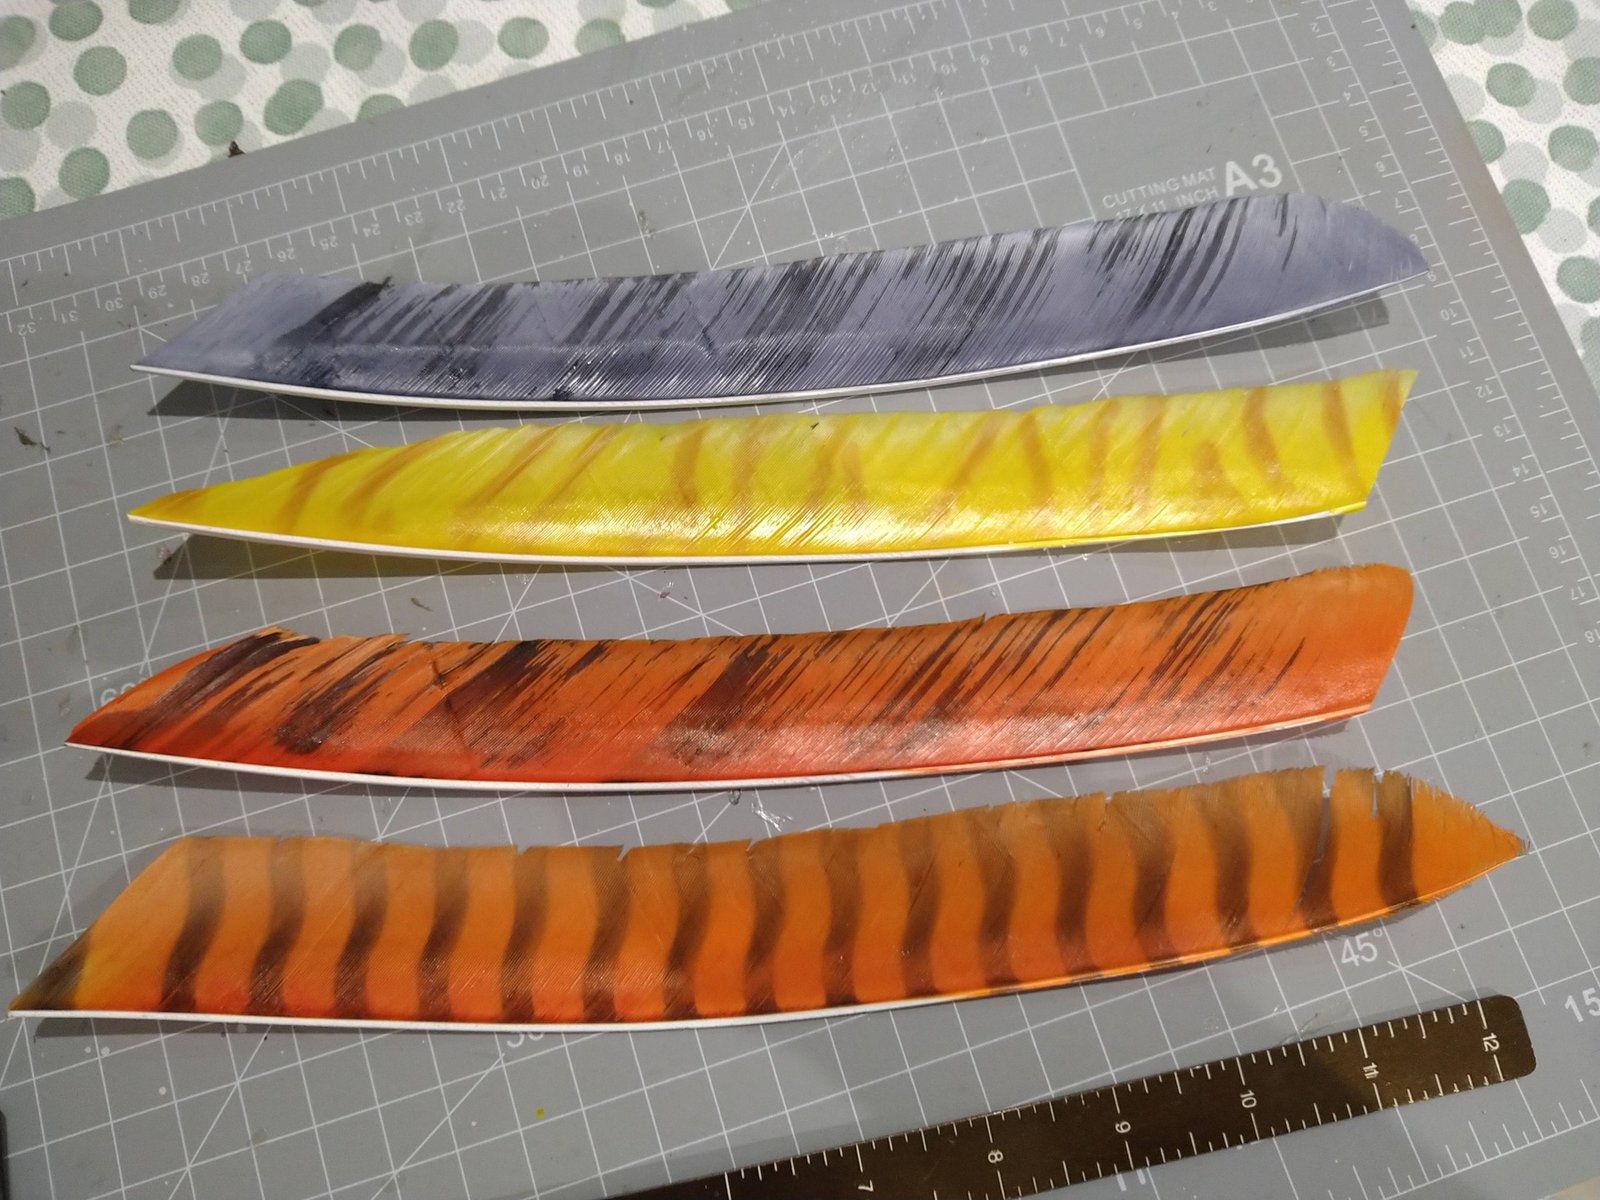
Thus, I was able to find great feathers for the flame pattern, all Bearpaw: zebra orange/yellow, orange/black camo, and grey/black camo. For the bird of prey pattern, again it was Bearpaw I turned to, with their barred orange feathers.
Matching colours, and creating patterns, and looking at contrasts are techniques that will vary from archer to archer.
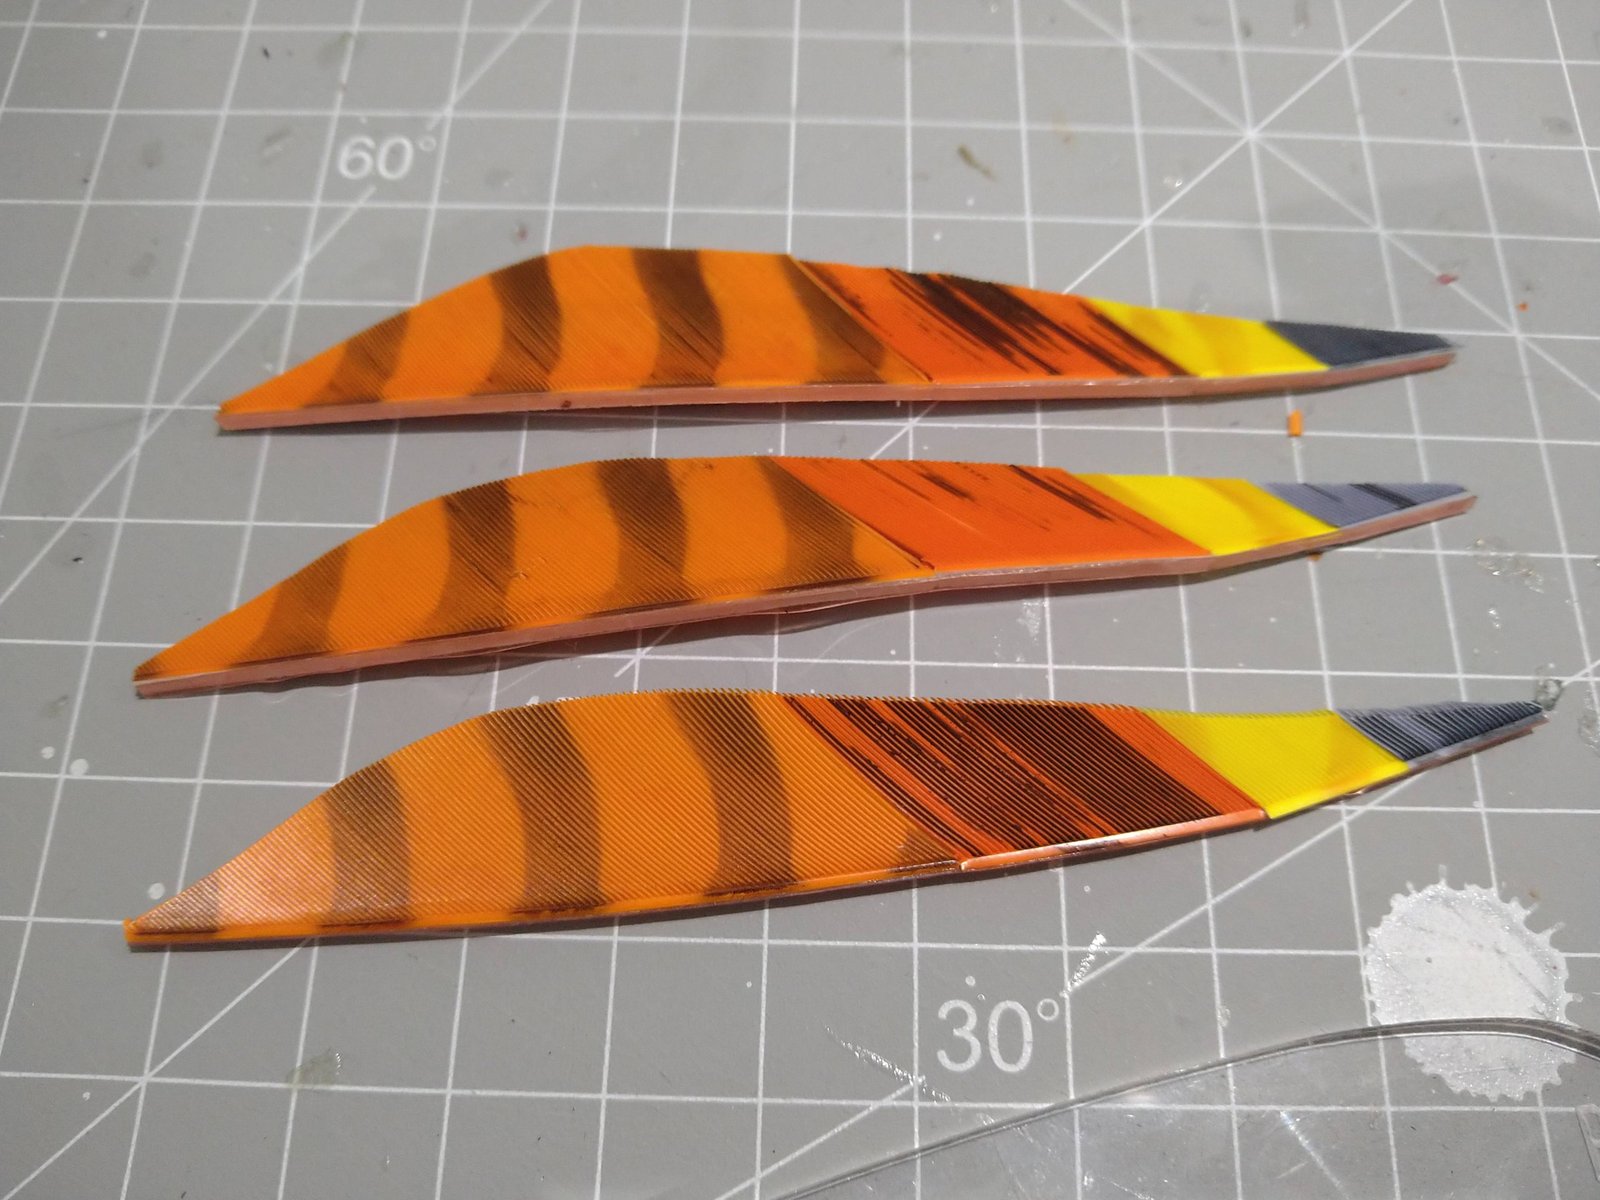
In my case, I want to make sure that there is a balance between the flame colours, and the bird of prey pattern. Neither one should overshadow the other. Therefore, for the flame element, I used half an inch for the grey and yellow, and an inch for the orange. Each colour is attempting to create the same blend of colours seen in a simple flame, from the transparent heat at the base, into yellow, and then into orange.
As for the bird of prey element, barred feathers work best, as many species, from eagles to owls, have barred wing feathers. Keeping with the fantasy theme of a phoenix, these are orange with black bars and will make up the remaining three inches.
Here I will present the simpler, and quicker way to create spliced feathers. There is a more intricate way, however, this method has a greater advantage in terms of economy.
When you have the full-length feathers before you, you will notice that the base of these will be flimsier towards the front and rear. Once you begin the cutting stage, make sure that the base parts of the feathers that you cut from are consistent with each other in terms of width and in general.
Using the measurements you want, cut the lengths off each of the full-length feathers. When cutting use small, very fine scissors, like the kind your mother would have for doing cross stitch with. Angle the blades of the scissors with the angle of the barbs on the feather, so there is a slight diagonal to the cut. This can create a basic and neat way for the different feather segments to slide into one and other. If you don’t achieve a diagonal cut – as the scissors can push the base of the feather back to a straighter angle – don’t worry, just make sure that you are using a straight across cut for all your feather segments. Alternatively, you can cut at a diagonal across the width of the base for a similarly neat connection between the feathers.
The advantage of this way to make spliced feathers means that should a part of the fletch become damaged – and don’t care how good you are, we all have to go hedge hunting – that individual segment can be removed and replaced without losing the entire fletch.
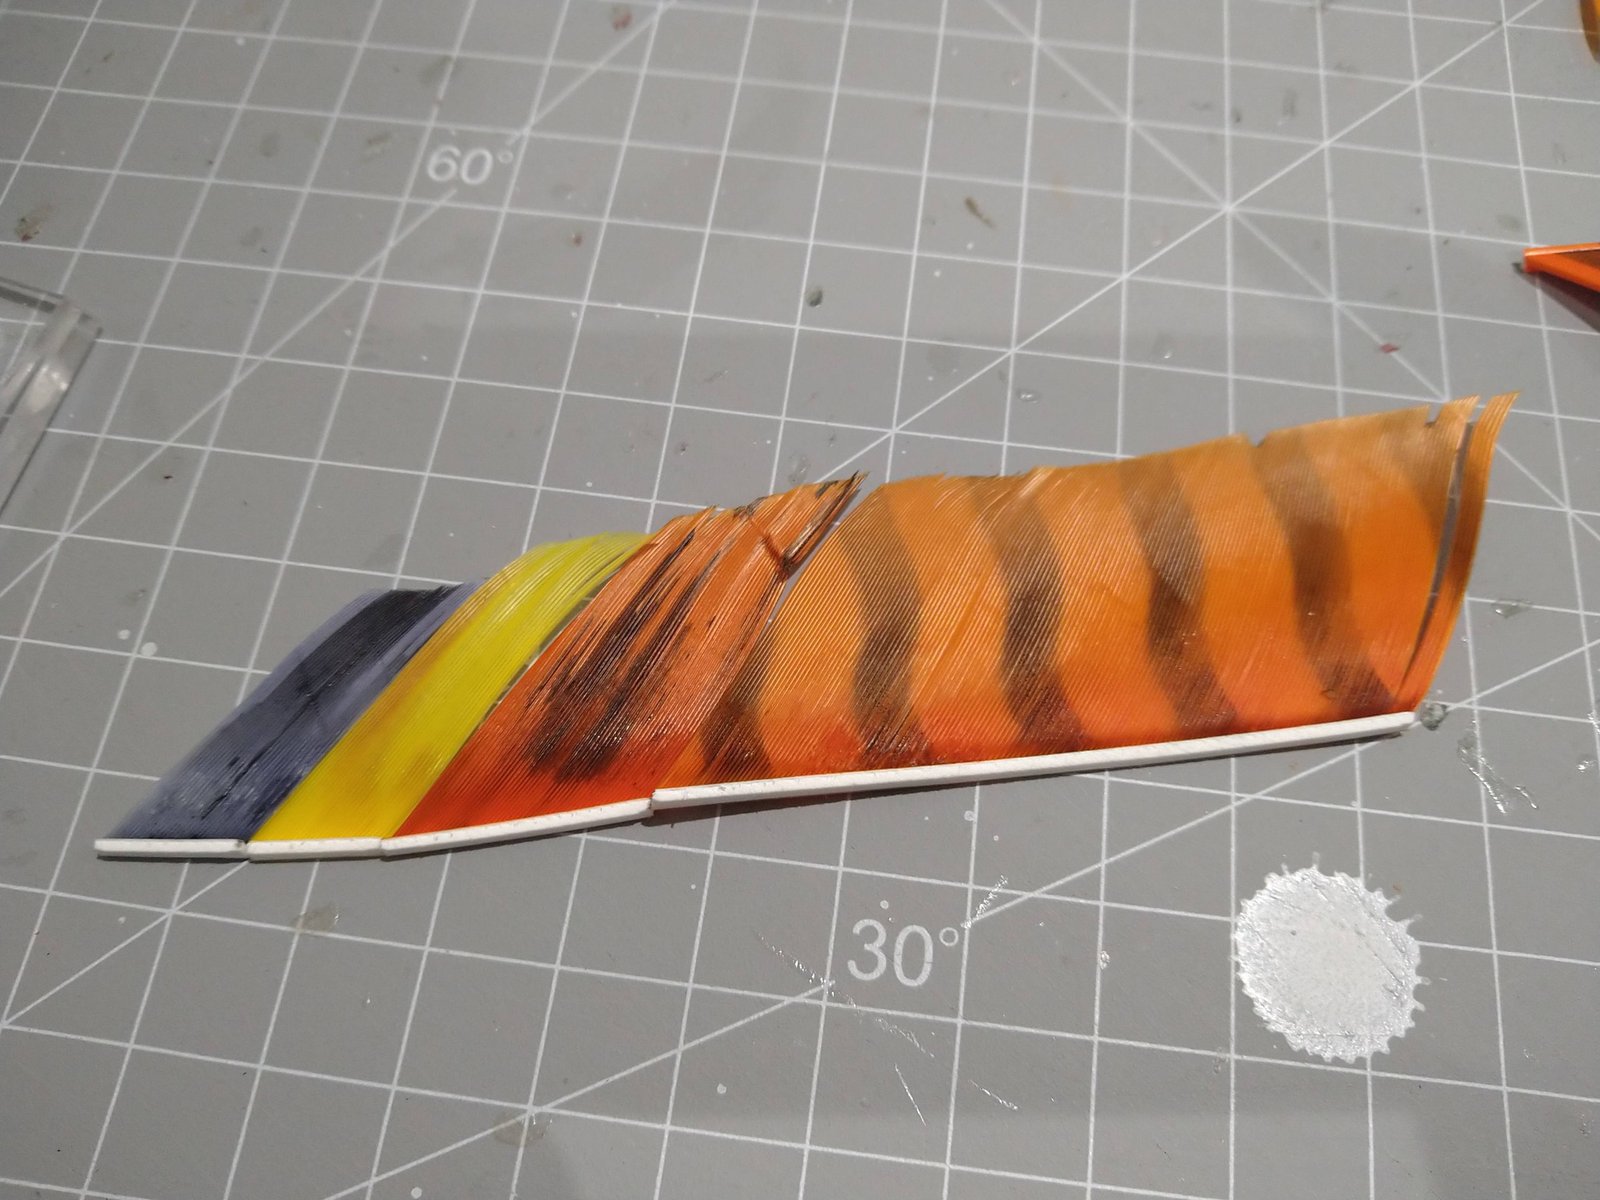
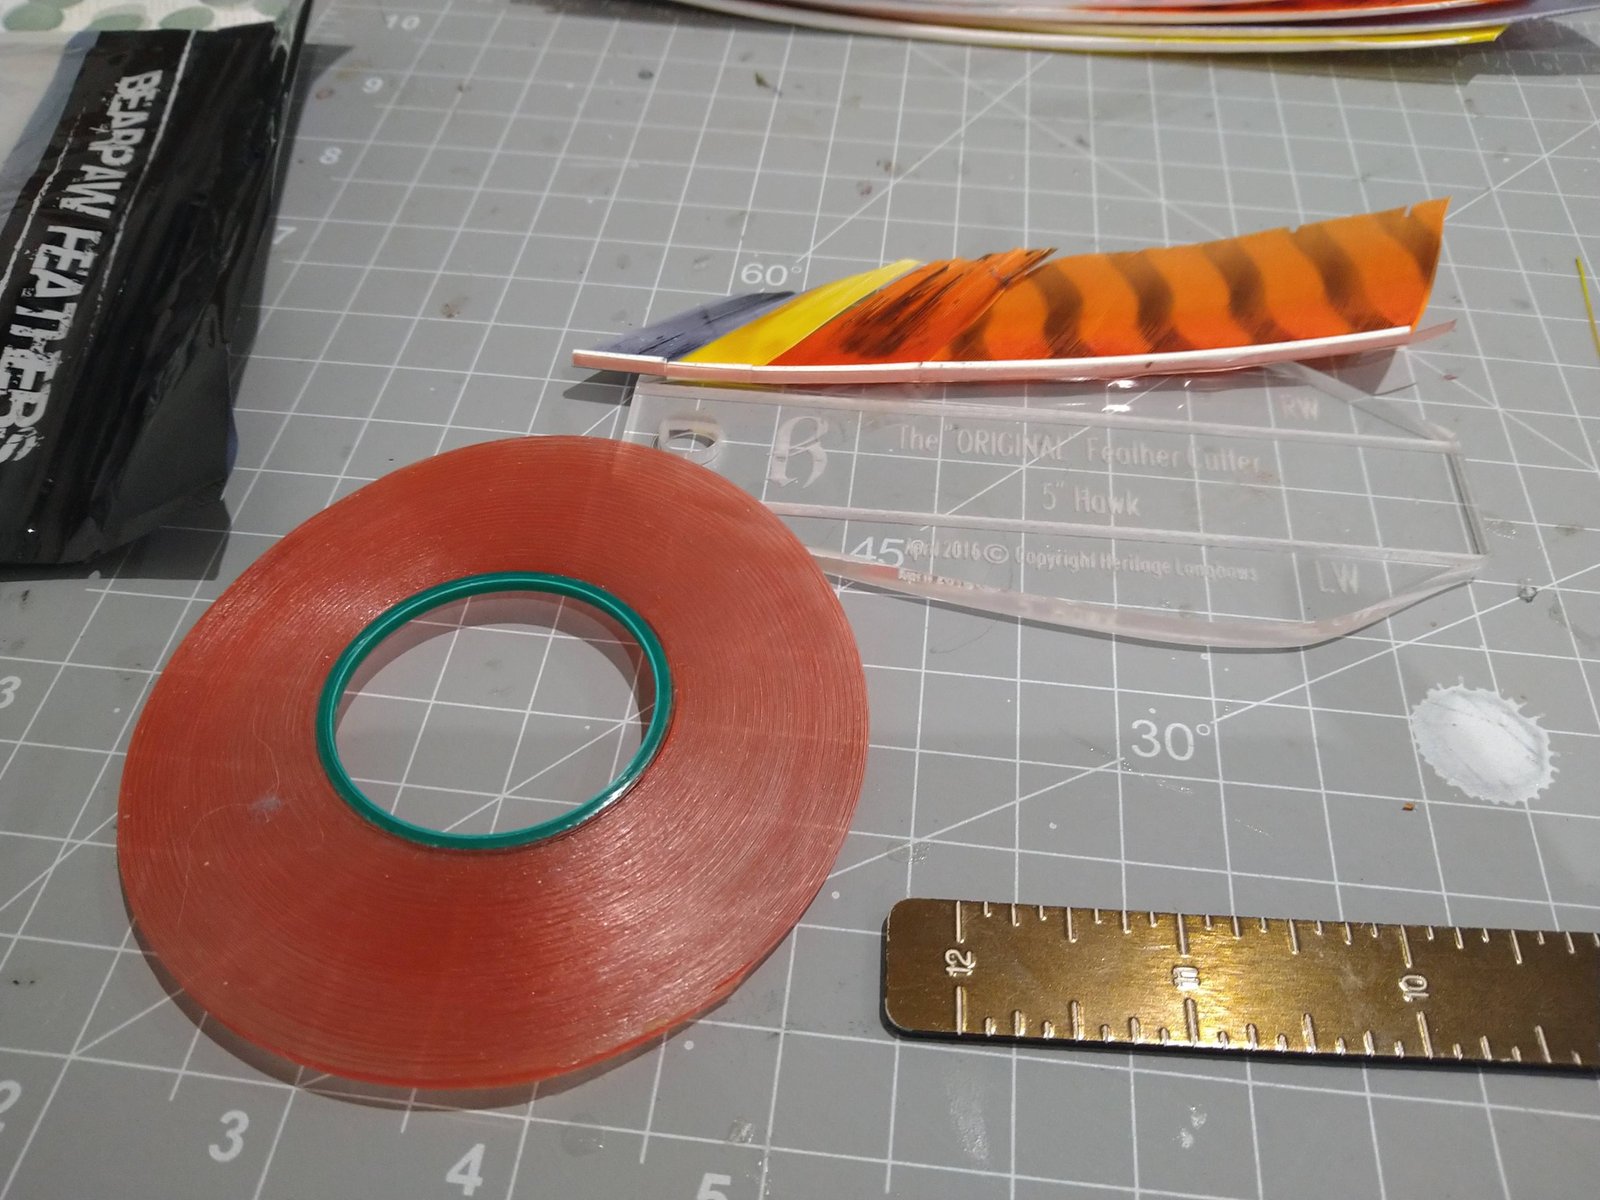
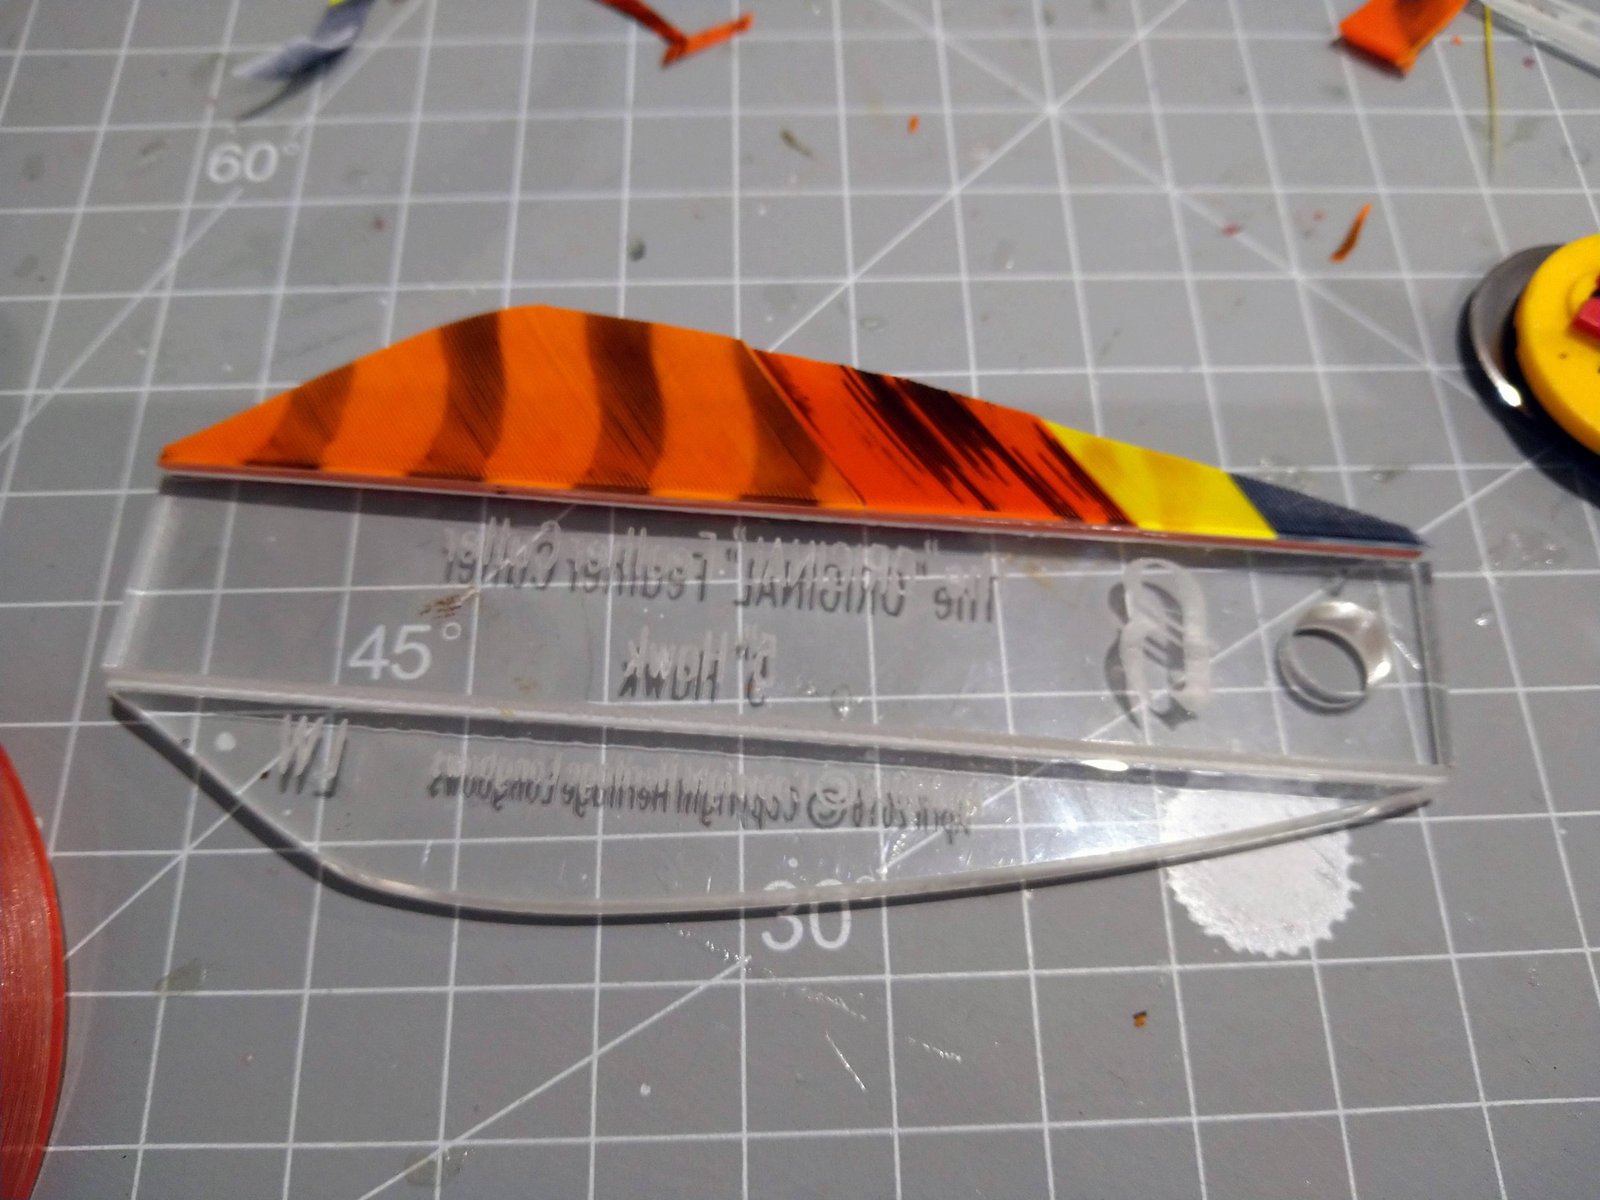
When you have the feathers cut, take a length of fletching tape that matches your chosen fletch length. Delicately place each segment of feather along the strip of tape, making sure that the base parts are all pushed together.
With the segments secured, you can opt to take a needle and dab a small measure of glue on the point. If you have the dexterity, you can pry the barbs apart where each segment connects, and dab the glue between them, letting is leach into material of each.
Now, having chosen your cutting template, fit the feather into it, and with a roller blade, cut it to shape. I recommend going against the barbs for a neater cut.
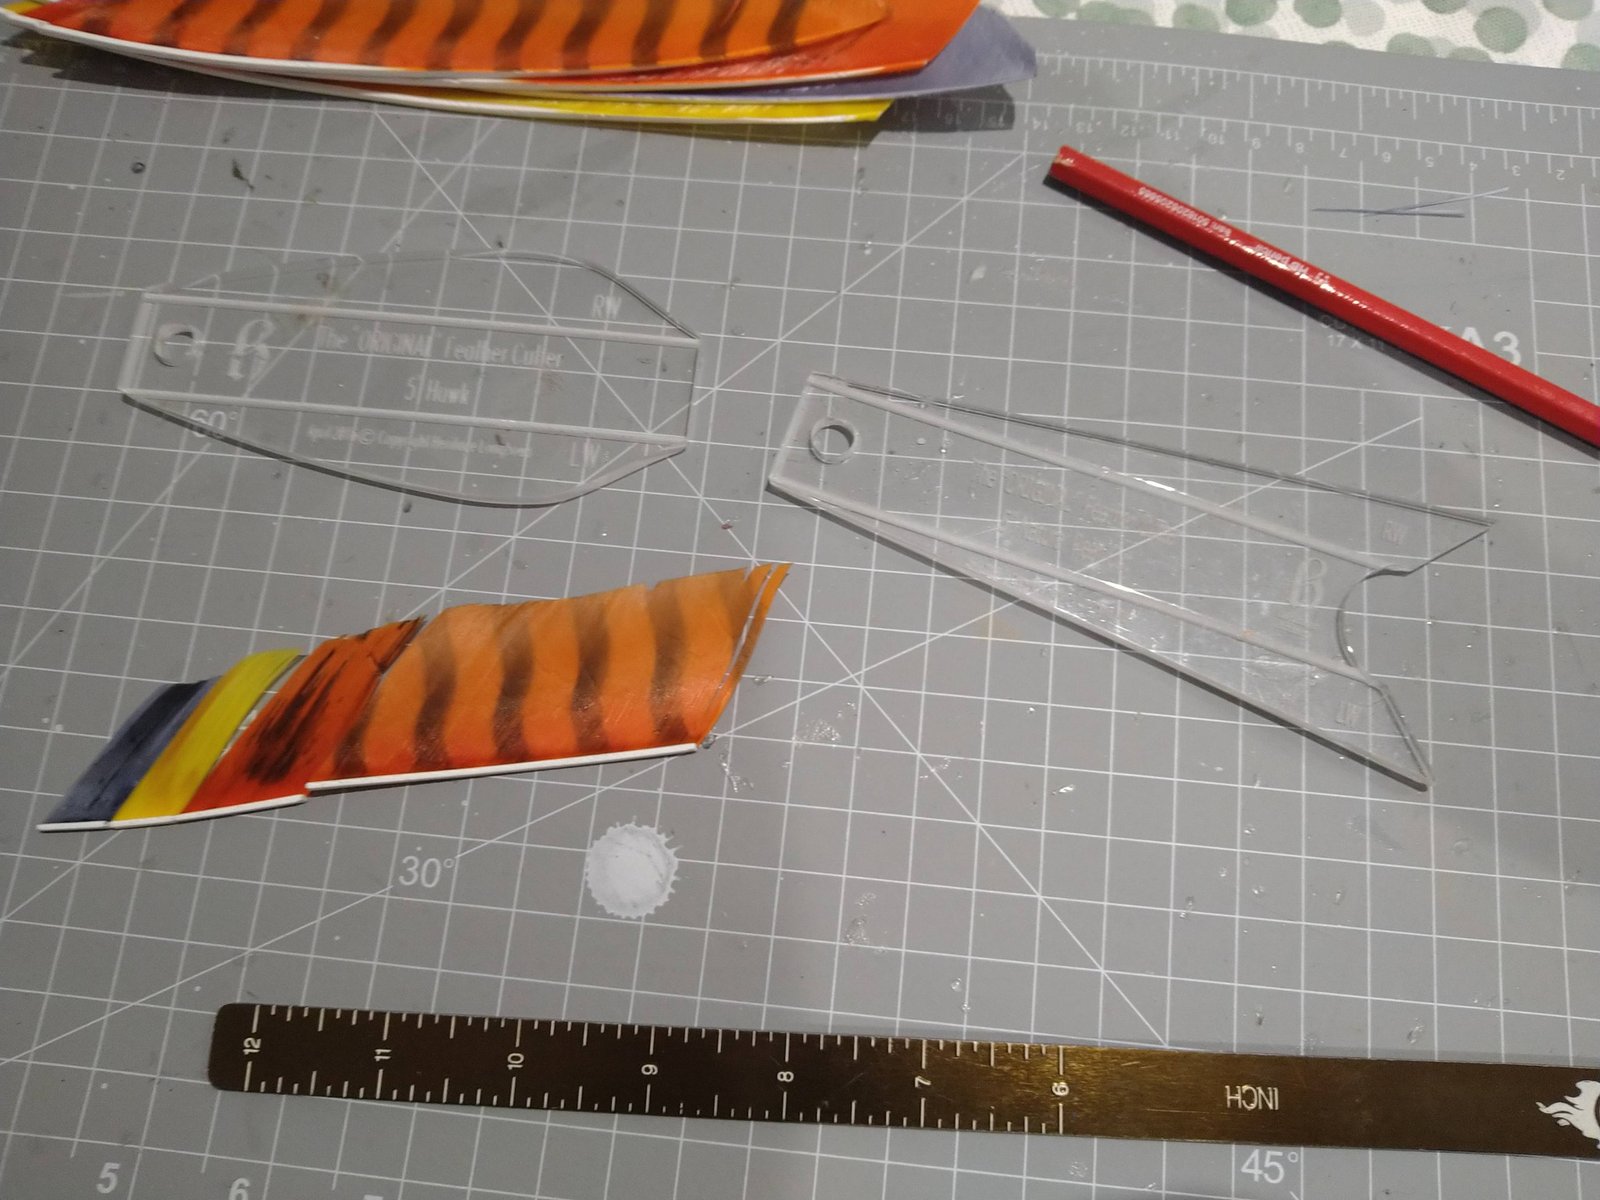
I can talk endlessly on the advantages and disadvantages of the many different fletch shapes but shall spare you from that. I will just say that if you are looking for greater speed, more stability, or to slow things down, there will be a fletch shape that works for you.
When it comes to applying the fletches to the arrow, after placing the fletch in the clamp, very gingerly remove the tape used earlier – you can keep it on and use it to adhere the fletch to the arrow if you want, I personally have never found the tape to be reliable. Apply the glue along the base as you usually would and fix the feather to the arrow shaft.
Views: 9
This article is part of our free content space, where everyone can find something worth reading. If it resonates with you and you’d like to support us, please consider purchasing an online membership.